Posts

Showing posts from November, 2021

Indesign 3 Tutorials

Image
 The pencil tool  https://www.youtube.com/watch?v=rnXFsq8FEec           I think that this tool will be pretty easy to use, in general. It's giving me very much adobe illustrator pen tool vibes. All you have to do is draw your line and then let go and then you have the line that you wanted. I think I will use this tool a lot if I wanted to draw something specific, and something that can have some rougher edges. I found it super interesting that you can move the line across the x and y axis, and you can rotate whatever line that you draw. I also thought it was interesting that you can put a shadow behind your line, and basically do anything that you desire with it. I feel like this tool is going to prove to be very useful to me whenever we start this new program.  The line tool https://www.youtube.com/watch?v=jEvvDVKH8Go          I think that this tool looks super easy to use, and I feel like this would be a very good one to use. I like that this tool, unlike the pencil tool, will gi

Autoscopy Project

Image
  Estimated time to complete: 1 hour               My initial inspiration for this project was that I feel like sometimes I have my head in the clouds. I feel like I am a daydreamer, and I always find myself staring into "space." When I do catch myself staring into space, I like to think about aliens. I have always though aliens were so cool and we barely know what life exists on our planet, so I definitely do feel like there has to be some form of life on other planets. I also wanted to play with the idea that I like to stare into "space," by using some elements from space, such as the UFO and aliens. I thought this would be clever.                I had to use many different tools to get this project completed how I wanted it to be, such as the quick selection tool to make all of my masks. I had to make four different masks for myself, both aliens, and the UFO. I also added adjustment layers to everything to make the colors exactly how I wanted them. I also had to

Somewhere Project

Image
  Time to complete: 1 hour               For my somewhere project I decided to use a photo from Family Feud because this was one of my favorite shows to watch when I was growing up. I figured that I could pretty easily photoshop myself as one of the family members standing at their podium, so this is what I decided to do. I also always wanted to be a contestant on this show, so I knew that this project was my chance to get as close to being on the show as I could. I used many different techniques for this project, mainly the masking technique. I had to mask myself out of the photo that I placed embedded into the original photo of the family. I used the refine edge brush tool, to get a more perfect image of myself around the rough edges that were originally present.                Once I had the proper image of myself in there, I placed in a few different adjustment layers to try and make myself blend in a little bit better. I messed with the hue and saturation and vibrance adjustment l

photoshop photos inspo for somewhere project

Image
           I think it would be hard to photoshop myself into this because of the shape of the instagram post that is already photoshopped in there and also the specific lighting and clothing that would have to be perfect.           This inspired me for the somewhere project because I feel like it could be cool to photoshop myself being next to or with an olympic medalist, or I could put myself on the podium or something like that.           This one really made me laugh because I thought it was funny that instead of making the kid taller, he made the dad shorter by removing his body.           I thought this illusion was funny and also looks really doable if I would want to try it. I really liked this illusion.

Photoshop project BW to color

Image
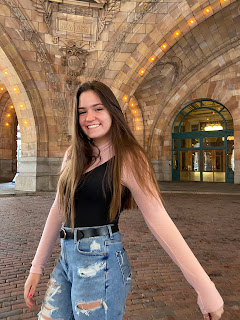
  Time to complete: 6 hours          I chose this picture to being with because I feel like it is a great representation of myself. I am always happy and love my city of Pittsburgh, which is in the background of the photo, so that is why I knew this photo was absolutely perfect. I had to use many different techniques in this project that really stressed me out, and took me a very long time to get exactly as I wanted. Utilizing many different layers in photoshop was definitely my key to success, as I don't know if I would have been able to do it without all these different layers. Many tears were shed in doing this project, as getting the tag brush into photoshop was difficult, too. In the end, I prevailed.           My color choices were based off of the fact that in the original picture I really liked the way that my blue jeans popped. I chose a blue that I liked on color.adobe and I ran with it. My absolute favorite was definitely square, as that is the first one that I completed

Brush Tag Project

Image
           For my artist tag, I really wanted it to have the splatter effect because that is my favorite spray. I thought this one would really give my design that grunge look that I was going for. I chose to flip the negative upside down because I wanted it to look smeared near the top of the fire, and get sharper as it goes farther down. I chose pink and purple for my colors because these are my top two favorite colors. I like the contrast between the dark purple with the light pink, so that is why I chose the shades that I decided on. I made the splatter bigger because I wanted it to be big and thick around the center of my logo, and fade out as it gets smaller toward the edges.           We used many different techniques in photoshop in order to get this print tag that I ended up with, such as that I had to use many different layers. We had to create a path around the logo, in order to get the appearance that we spray painted it out of cardboard. I put the scratches zoomed in on a